
Perhaps, the most difficult concept to comprehend in photography is flash/strobe photography. What makes the flash/strobe photography convoluted concept is that we do not have any mechanism to visualize the exposure beforehand while using a flash/strobe. Neither live view nor camera meter can gauge exposure before clicking the picture. We do have external light meters for measuring flash/strobe exposure. However, these external light meters can be very expansive and overkill for a beginner.
In this post, I will attempt to explain how to use Flash/Strobe for your next project.
Let’s first begin with some definitions.
Strobe: A studio strobe light is primarily used in a studio for lighting. Strobes are larger and is powered through an outlet or a battery pack and pump a lot of light. Since, a strobe cannot be mounted on a hot shoe slot at the top of a camera, the strobe communicate with the camera either using a wireless transmitter or a wire sync cable.
Flash: A flash, also called a speedlight or hot shoe flash, is a camera light that sits in the hot shoe slot at the top of the camera. However, flash can also be triggered wirelessly using the wireless transmitter and operates much like low power strobes.
The confusion
Exposing a natural light photo is straightforward (for the detailed explanting please go through the post titled ‘Exposure and More’); we adjust exposure using Shutter, Aperture & ISO. interestingly, shutter has no effect on light coming out of a flash/strobe. Simply put, a shutter speed of 1sec or 1/8000sec will produce same exposure if aperture & ISO kept same. Shutter will only effect ambient light. Aperture & ISO are only 2 settings that can affect the light coming from flash/strobe. Confusingly, aperture & ISO will also affect ambient light. Hence, to tackle the conundrum, flash/Strobe have mechanism to increase or decrees the light intensity.
How
- Shutter speed: although, shutter has no effect on flash/strobe exposure, we need to set shutter speed substantially fast so as ambient light doesn’t affect our exposure. However, every camera has a sync speed. sync speed is the fastest shutter speed at which a camera and flash/strobe can sync. Most cameras have sync speed of 1/60 to 1/500 sec or slower. Shooting faster than sync speed while using a flash/strobe, camera’s shutter will close before the flash/strobe can be fully captured by the sensor, resulting in black bands in the photo. This limitation of sync speed can be overcome if a flash/strobe supports ‘high speed sync (HSS)’. However, HSS is out of scope for this post.
- Aperture: the fun setting! Aperture affects both flash exposure and ambient light exposure. Hence, it is the critical setting while using the flash/strobe. The smaller the aperture (F/22, F/16) the less effective/bright the flash/strobe. The larger the aperture (F/4, F/5.6), the more effective/bright the flash/strobe. Accordingly, we tend to keep aperture between F/4 to F8 as shallow depth of field/bokeh is not evident while shooting in studio. Conversely, while shooting outdoors, flash/strobe is typically used as a fill light; refer to the post titled Mixing Flash & Natural Light for the detailed explanation.
- ISO: can also affect both flash/strobe and ambient light exposures. Since, we are using flash/strobe, no point going beyond base ISO of your camera. Having said that, increase ISO can be very advantageous while working with low power flash/strobe as it can make it more effective.
- Flash/strobe Power: once we have dialed all the 3 camera exposure settings and we have a desirable ambient exposure, usually black frame in studio setting. Next is to dial in Flash/Strobe power setting. We can either let camera adjust power automatically using a feature called TTL (through the lens) or adjust it manually. Adjusting power manually is as simple as rotating the dial to increase or decrease the brightness of flash/strobe until u archive desirable exposure.
Let’s breakdown an example:
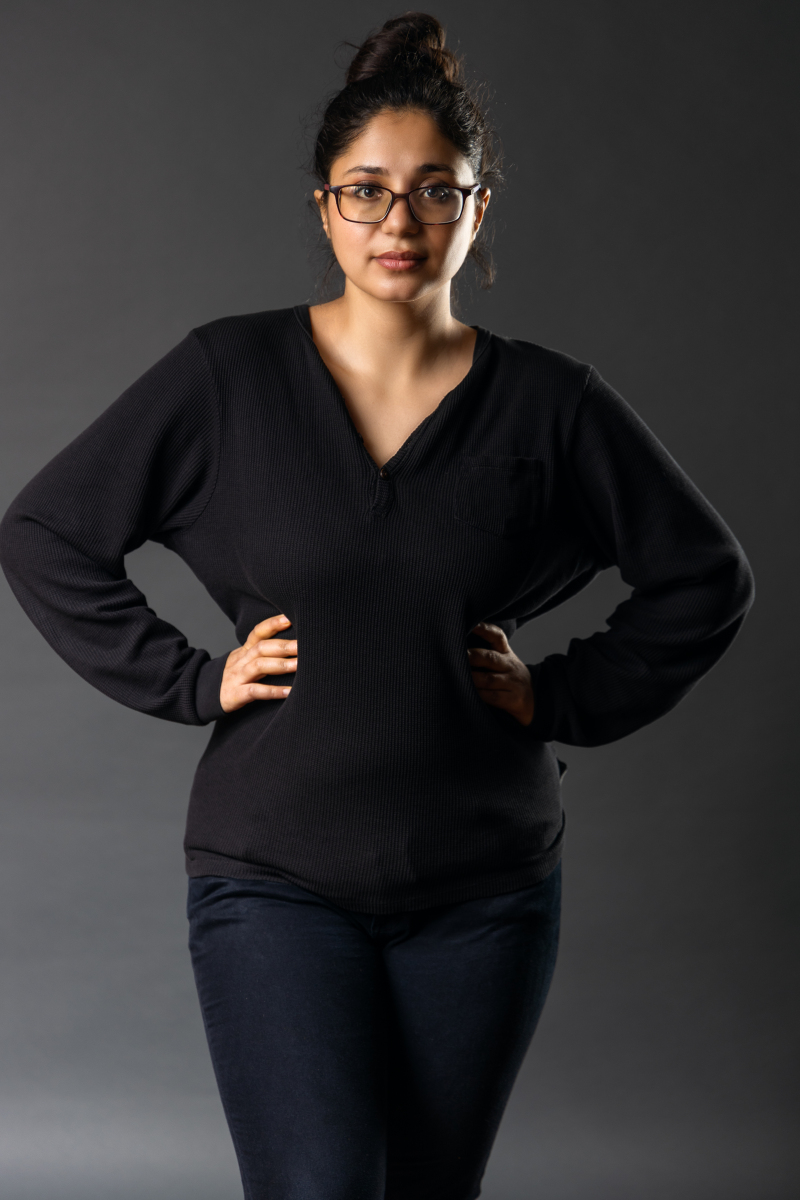
Shutter: since I was shooting in a studio space, I kept the shutter speed at the sync speed of my camera 1/160sec.
ISO: 100, as I am using strobes to expose the subject
Aperture: since, I was shooting in a studio space and with a low power strobe (Here, Godox AD200) as key light, I kept aperture at F/4.
These settings gave me pretty much dark frame.
Strobe power: Full power – 1/1; it exposed subject as well as background to my taste.
Gear: Canon EOS R with 24-105 F4 L Lens, Godox AD-200 Flash, Godox UB-165S, 65 inch reflective umbrella and Sonia LS-250 9 Feet Portable Foldable Light Stand.
Model: kaur_strength
Thanks for the great article!
Welcome 🙂 much appreciated.